
 Pin it
Mini Crunchwrap Supremes are the perfect solution for busy school mornings and easy family dinners. These handheld wraps offer a crispy, satisfying bite that kids and adults alike will love. Inspired by the fast-food classic but sized just right for little hands, making them at home lets you control the ingredients and customize fillings to suit your family's tastes.
I first made these mini crunchwraps on a hectic school morning, and they quickly became a go-to lunch. Now my kids ask for them weekly, and I love how easy they are to pack with fresh sides.
Ingredients
- Small flour tortillas: around fajita size which are perfect for folding and crisping
- Ground chicken or beef: providing protein and a flavorful filling - choose freshly ground for best texture
- Olive oil: for cooking, picked for its light flavor and health benefits
- Garlic powder, onion powder, and paprika: to build a warm, savory seasoning. Use fresh spices for maximum aroma
- Salt and freshly ground black pepper: to enhance all the flavors
- Small round tortilla chips or tostadas: add a satisfying crunch inside
- Shredded lettuce: for freshness and crunch
- Diced tomatoes: bring juiciness and a bright note
- Dairy-free sour cream or mashed avocado: add creaminess with a healthy twist
- Cooking spray or a small amount of oil: to get the crunch without excess grease
Step-by-Step Instructions
- Prepare the Filling:
- Heat olive oil over medium-high heat in a skillet until shimmering. Add the ground chicken or beef and break it apart with a wooden spoon. Stir in garlic powder, onion powder, paprika, salt, and pepper evenly. Cook, stirring frequently, until the meat is fully browned and cooked through. Remove from heat and set aside to cool slightly. This step builds the base flavor, so take your time to cook the meat well.
- Assemble the Mini Crunchwraps:
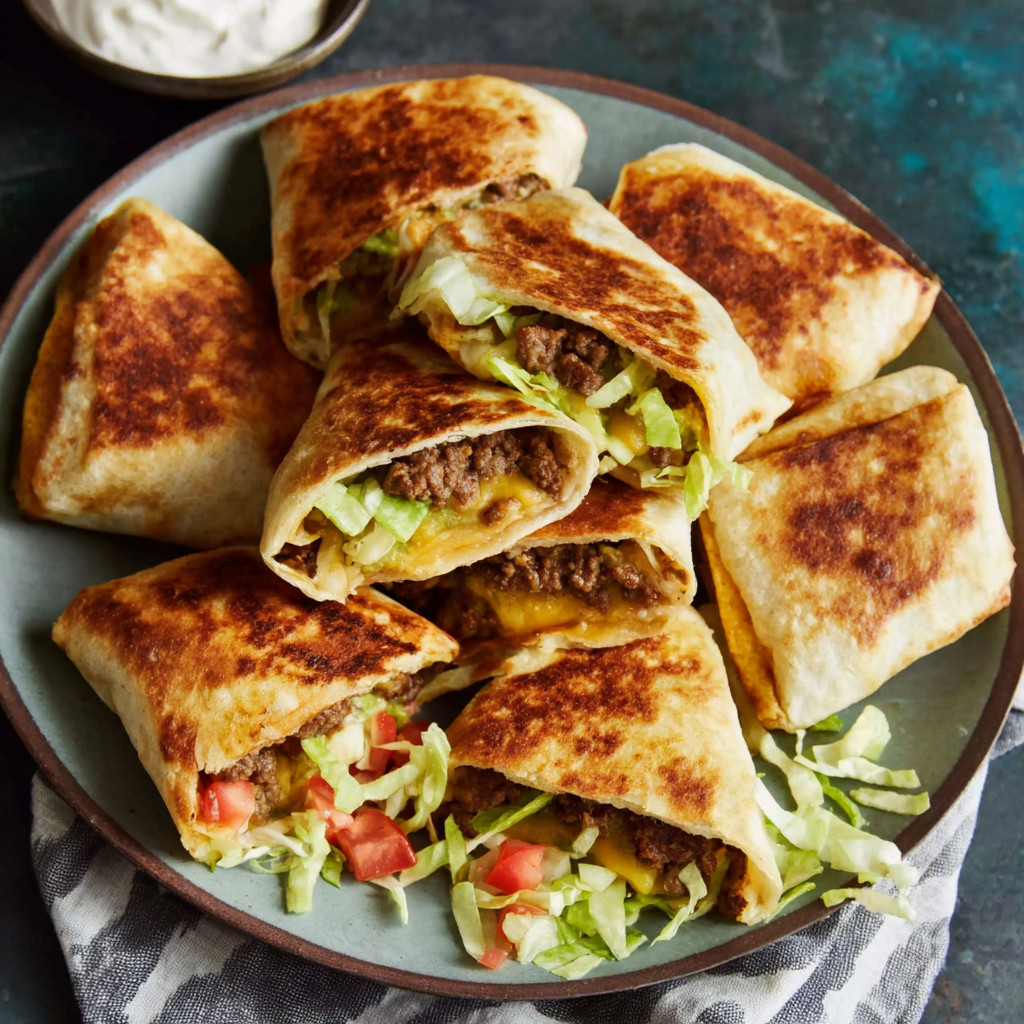
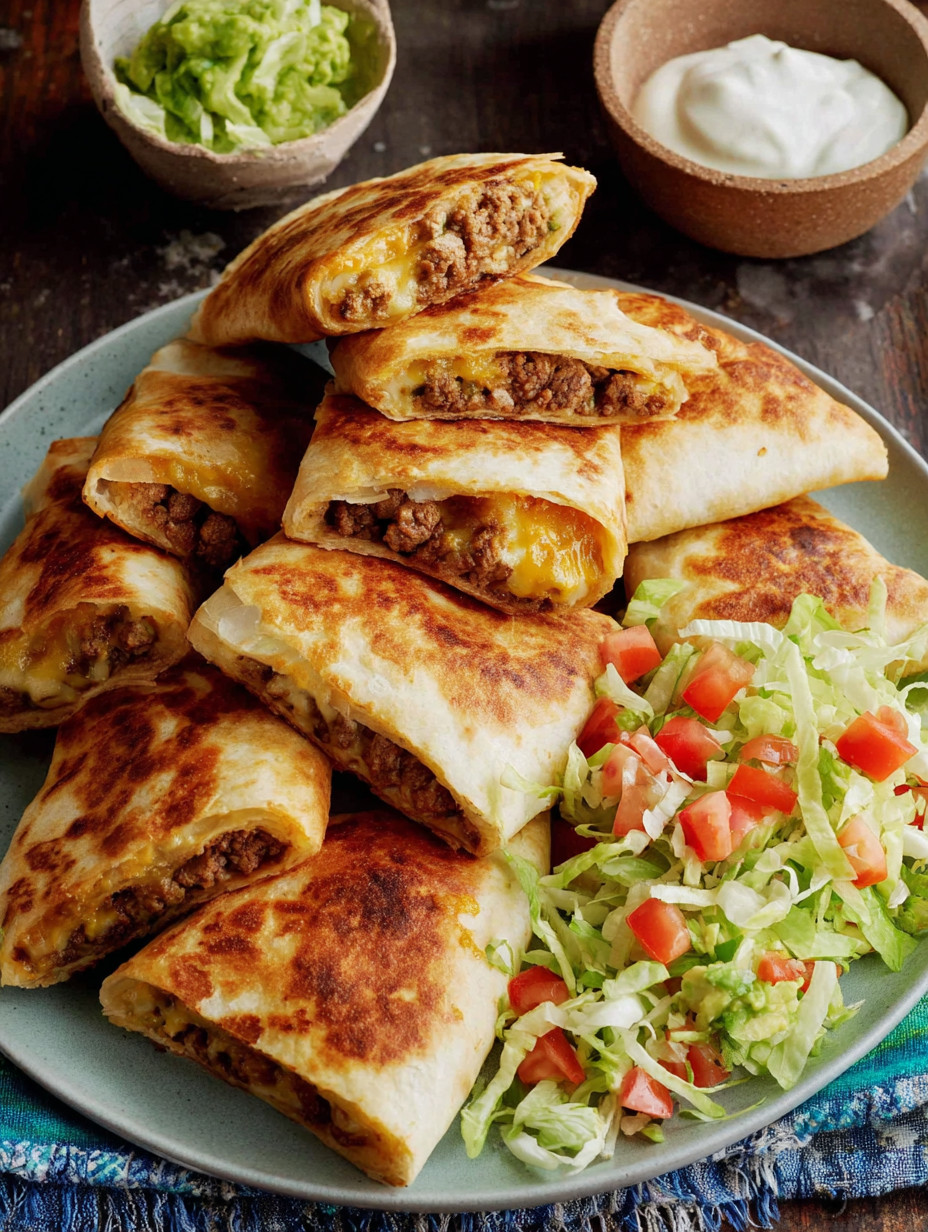
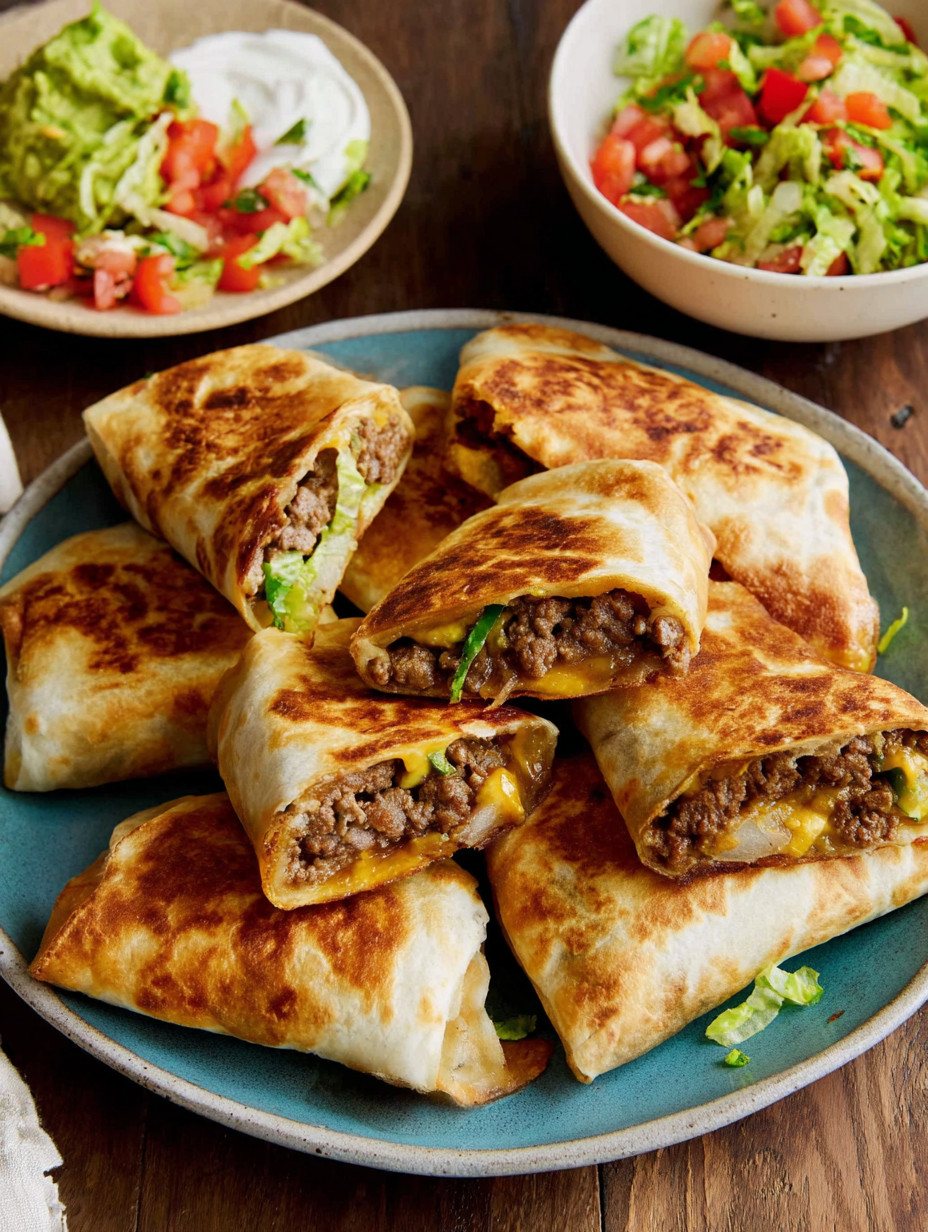
- Lay one small tortilla flat on your work surface. Spoon a generous portion of the cooked filling into the center. Place one small tortilla chip or tostada on top of the meat to add crunch. Add a layer of shredded lettuce, followed by diced tomatoes, and finish with a small dollop of dairy-free sour cream or mashed avocado if using. Be careful not to overfill to keep folding easy.
- Fold and Seal:
- Fold the edges of the tortilla inward to pleat and seal toward the center, enclosing the filling completely. Press gently but firmly to flatten the wrap and secure the layers inside. This folding technique creates the signature crunchwrap shape and keeps everything tidy while cooking and eating.
- Cook Until Crispy:
- Heat a clean skillet over medium heat and lightly grease it with cooking spray or a small amount of oil. Place each assembled crunchwrap seam-side down in the skillet. Cook for about two to three minutes on each side until golden brown, crisp, and warm all the way through. Cooking seam-side down first helps seal the wrap and prevents it from opening.
- Cool and Pack:
- Let the mini crunchwraps cool for a few minutes on a wire rack so they do not become soggy. Slice in halves if desired for smaller children and pack into lunchboxes with sides like fresh fruit or veggie sticks.
 Pin it
My favorite ingredient is the small tortilla chips inside. They add that unbeatable crunch which makes this recipe feel extra special. Family gatherings often have everyone sneaking bites before lunch even begins because they are so tasty.
Storage Tips
Store any leftovers in an airtight container in the refrigerator and consume within two days for best texture. To reheat, toast in a skillet or toaster oven to preserve crispness instead of microwaving which can make them soggy. You can assemble and freeze these before cooking; just thaw in the fridge and pan-fry as usual.
Ingredient Substitutions
Ground turkey or pork works just as well if you want to switch up the protein. For a vegetarian option, cooked black beans or seasoned scrambled eggs are delicious alternatives. Use corn tortillas to make a gluten-free version but handle carefully as they are less pliable for folding. Dairy-free sour cream can be swapped for traditional sour cream or plain Greek yogurt depending on your preference.
 Pin it
Serving Suggestions
Pair these mini crunchwraps with crunchy veggie sticks like carrots or celery and a side of fruit to balance the meal. A small container of salsa or pico de gallo can add fresh acidity and spice. You can also serve with a simple green salad or quinoa for something more filling.
Frequently Asked Questions
- → What meat options work best for the filling?
Ground chicken or beef both cook evenly and absorb the seasoning well, creating a juicy, flavorful filling for the crisp wraps.
- → How can I make these gluten-free?
Substitute flour tortillas with corn tortillas to accommodate gluten-free diets without sacrificing texture or taste.
- → What’s the best way to keep the crunchwraps crisp after cooking?
Cook the wraps seam-side down in a lightly oiled skillet until golden brown, then let them cool slightly before packing to maintain crispness.
- → Can I prepare these in advance?
Yes, you can assemble the wraps ahead of time and refrigerate overnight or freeze for up to two months, then reheat gently before serving.
- → Are there vegetarian alternatives for the filling?
Absolutely. Beans, scrambled eggs, or sautéed veggies make excellent plant-based or vegetarian fillings that hold up well inside the wraps.