
 Pin it
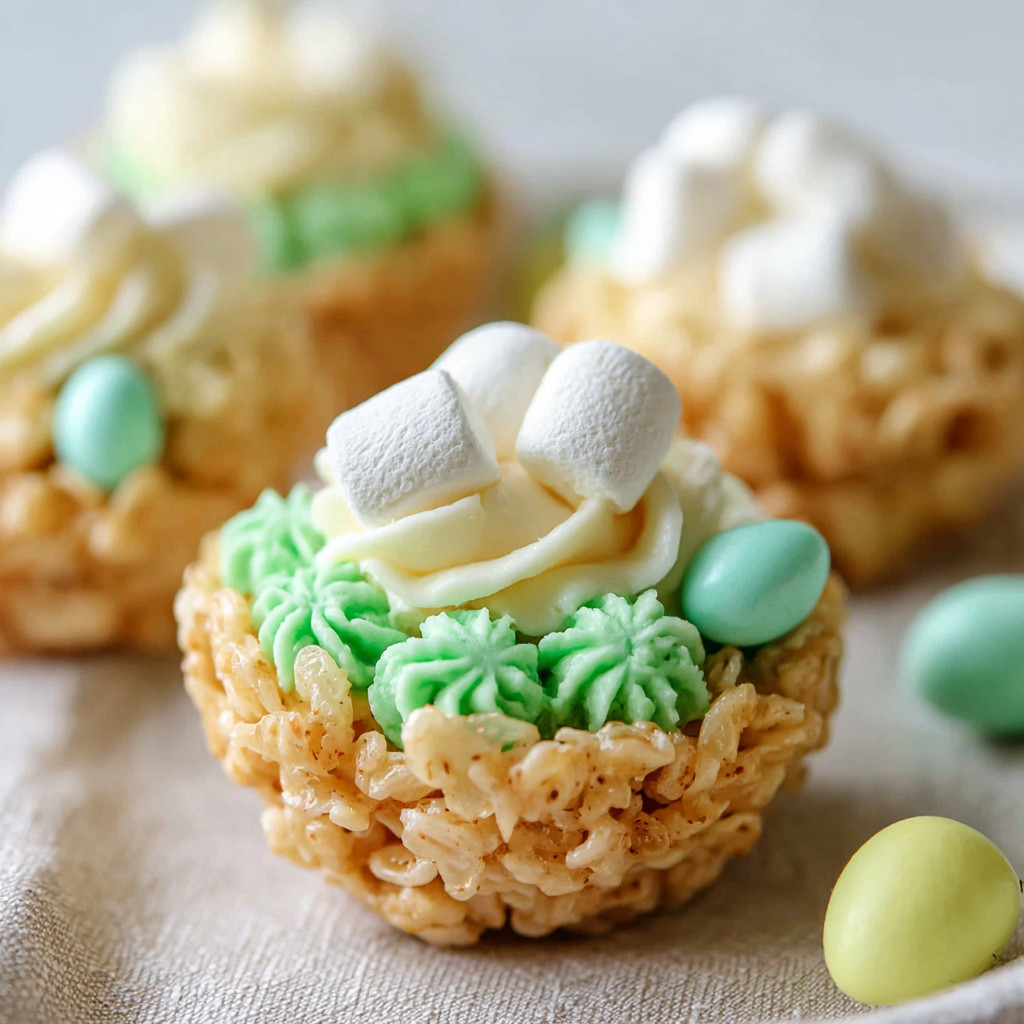
These adorable Easter nests treats offer a fun and festive way to celebrate spring with a sweet twist. Made with crispy Rice Krispies cereal mixed into a gooey marshmallow base, topped with creamy buttercream frosting and colorful candy eggs, they make for a delightful no-bake dessert that is easy enough for beginners.
I first made these with my kids a few years ago and it instantly became a holiday favorite. The bright green frosting and little candy eggs always bring a smile and make the table feel extra festive.
Ingredients
- Rice Krispies cereal: Seven cups for that classic crispy texture, choose fresh boxes for maximum crunch
- Marshmallows: Sixteen ounces of marshmallows, mini or jumbo, which create the sticky sweet binding, fresher marshmallows melt more smoothly
- Unsalted butter (for melting): Two tablespoons of unsalted butter to add richness and help with melting, room temperature butter blends best
- Milk: Quarter cup of milk for the buttercream, which helps achieve the right frosting consistency
- Vanilla extract: One teaspoon of vanilla extract adding warm flavor, pure vanilla extract gives the best taste
- Unsalted butter (for frosting): Half cup unsalted butter softened for the frosting base, use high quality for creaminess
- Powdered sugar: Three to four cups of powdered sugar to sweeten and thicken the frosting, sifted to avoid lumps
- Green food dye: Green food dye to mimic grass, gel dye provides stronger color without thinning the frosting
- Mini chocolate eggs or jelly beans: Mini chocolate eggs or jelly beans for decorating the nests with colorful, playful finishes
Step-by-Step Instructions
- Butter or Spray the Pans:
- Gently grease your cupcake pans with either butter or a nonstick spray so the nests release easily later. Set them on the counter so they are ready when you’ve mixed your base.
- Melt the Marshmallows and Butter:
- Place the marshmallows and butter in a large microwave-safe bowl. Microwave for about two minutes, watching carefully to prevent overflow. Once melted, stir the mixture until completely smooth and uniform in texture.
- Mix in the Rice Krispies:
- Into the melted marshmallow blend, add the Rice Krispies cereal. Stir vigorously to ensure every crunchy piece is coated sticky and well covered with the marshmallow mixture.
- Shape the Nests:
- While the mixture is still warm and pliable, spoon portions into each greased cupcake mold. Use a piece of wax paper to press down the center gently, forming a hollow nest shape. Allow the nests to cool and harden for at least 30 minutes.
- Prepare the Buttercream Frosting:
- In a large bowl, beat the softened butter, milk, vanilla extract, and two cups of powdered sugar for about five minutes until the texture turns creamy and fluffy. Gradually incorporate the remaining powdered sugar and green food coloring, mixing until you achieve the color and consistency you desire.
- Decorate the Nests:
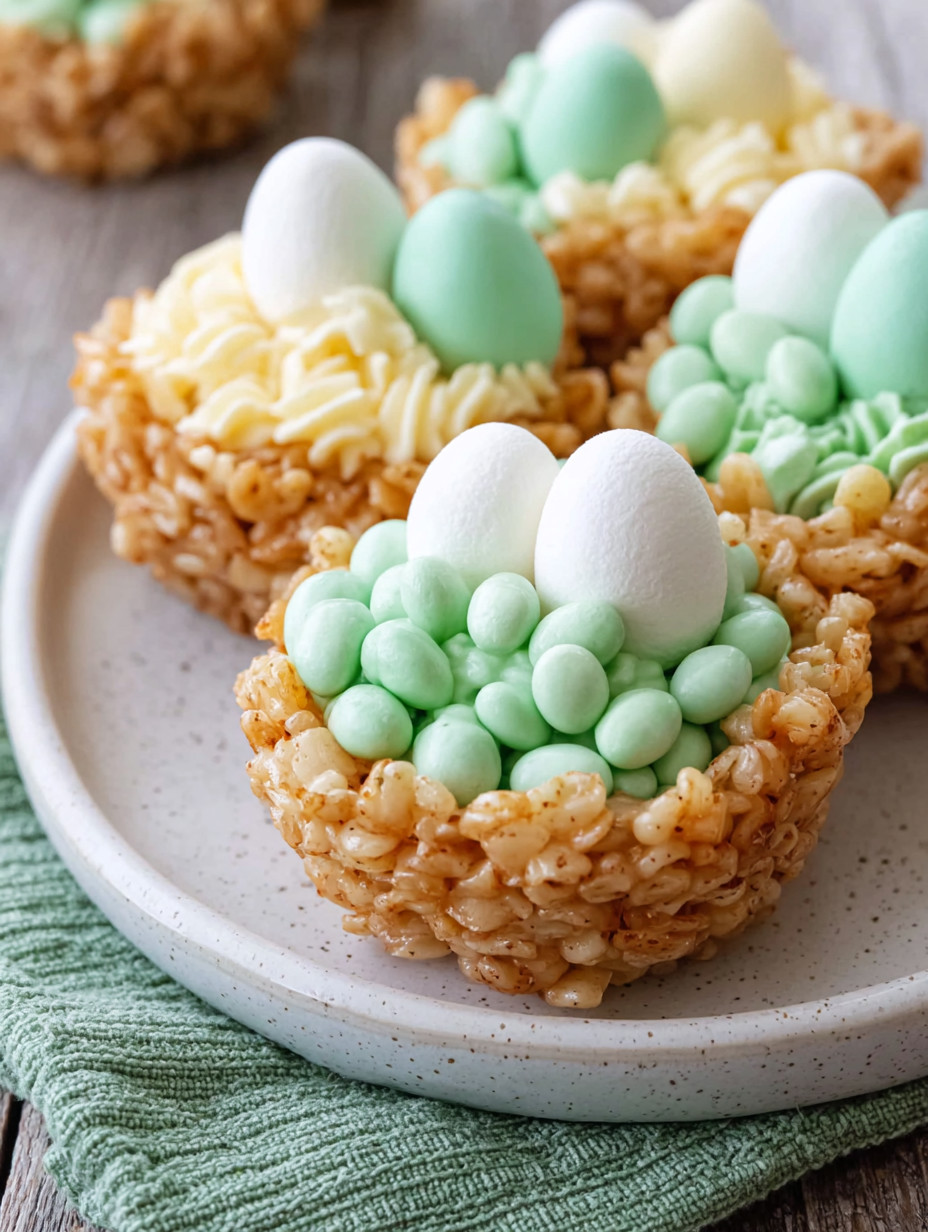
- Carefully remove the set Rice Krispie nests from the pans. Using a piping bag, fill the centers with the green buttercream frosting so it looks like grass. Top each nest with mini chocolate eggs or jelly beans to complete the springtime look.
- Let the Frosting Set:
- Allow the frosting to firm up a bit before serving. These nests are best shared fresh but also hold up well if made a day ahead.
 Pin it
My favorite part is the buttercream "grass" that gives these little nests their charming spring appeal. One year, my kids and I made a whole batch to donate to a neighbors’ Easter egg hunt, which brought a warm sense of community fun and simple joy.
Storage Tips
Store these nests in an airtight container at room temperature to maintain crispness for a day or two. If you keep them longer, refrigeration helps but may cause the marshmallow base to stiffen slightly. For best results, separate layers with parchment paper to avoid sticking.
Ingredient Substitutions
If you cannot find Rice Krispies cereal, puffed rice works as a similar crunchy base though the texture will be a bit lighter. For a dairy-free version, use a plant-based butter substitute and milk alternative, adjusting the frosting consistency accordingly.
Serving Suggestions
These nests make cute individual treats for Easter baskets, party favors, or dessert platters. Pair with a cup of hot cocoa or springtime tea for a cozy snack. You can also add edible flowers or sprinkles on top for extra flair.
Cultural Context
 Pin it
Rice Krispie treats originated in American kitchens as a quick and delightful way to make crispy marshmallow snacks. The addition of the nest shape and pastel candies ties them into spring and Easter celebrations, symbolizing new life and renewal in a playful edible form.
Frequently Asked Questions
- → How do I shape the cereal mixture into nests?
Press the warm Krispie mixture firmly into greased cupcake pans. Use a piece of wax paper to gently push down the center, creating a nest-like cavity before letting them cool and set.
- → What can I use if I don’t have marshmallows?
Marshmallows are key for binding the cereal, but as a substitute, you might try a homemade syrup of sugar and butter, though texture may vary.
- → How do I avoid the marshmallows from spilling over when melting?
Heat marshmallows and butter in short intervals, stirring often and watching closely to prevent boiling over in the microwave.
- → Can I make the nests ahead of time?
Yes, prepare the nests a day or two in advance and store in an airtight container to maintain freshness and shape.
- → What are some decoration alternatives to candy eggs?
Try jelly beans, mini chocolate chips, or colored sugar sprinkles to add color and texture on top of the nests.
- → How do I get the green frosting color?
Add a few drops of green food coloring gradually to the buttercream until the desired shade resembling grass is reached.