
 Pin it
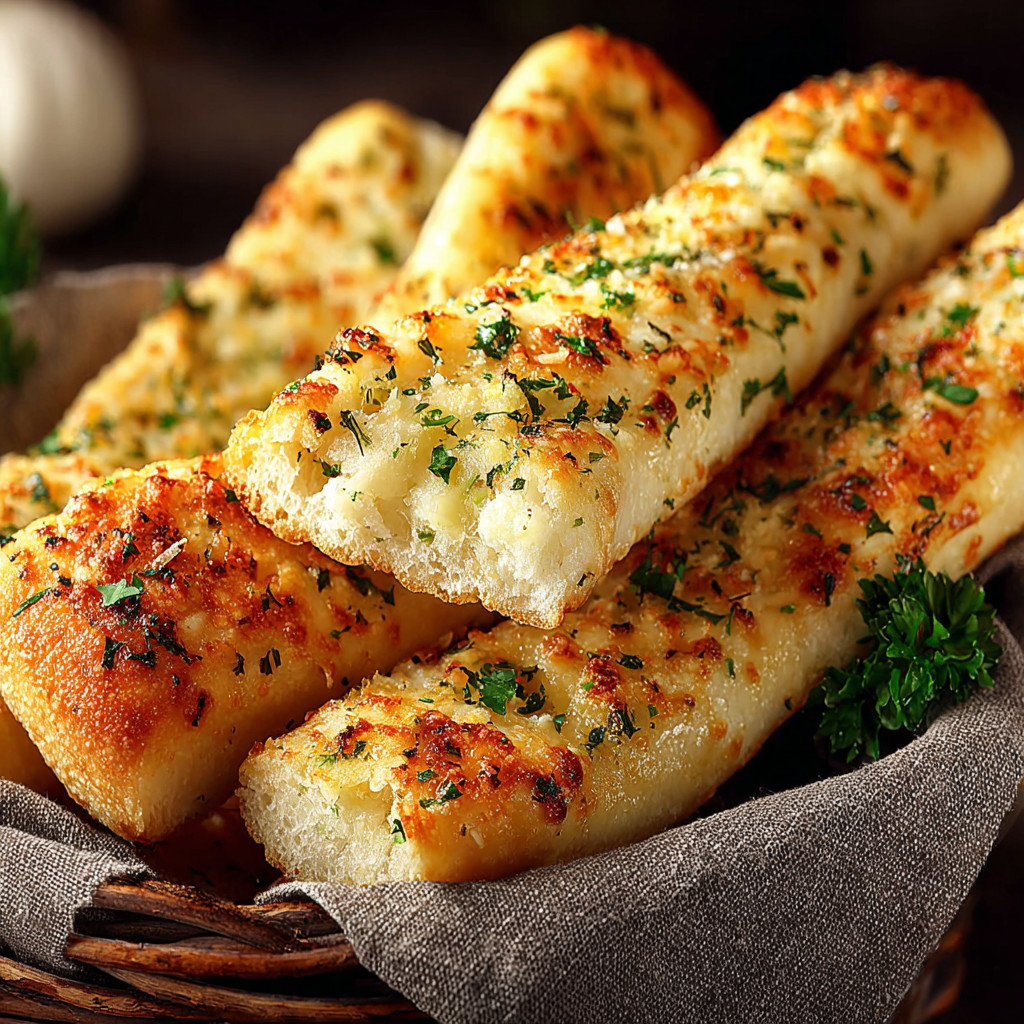
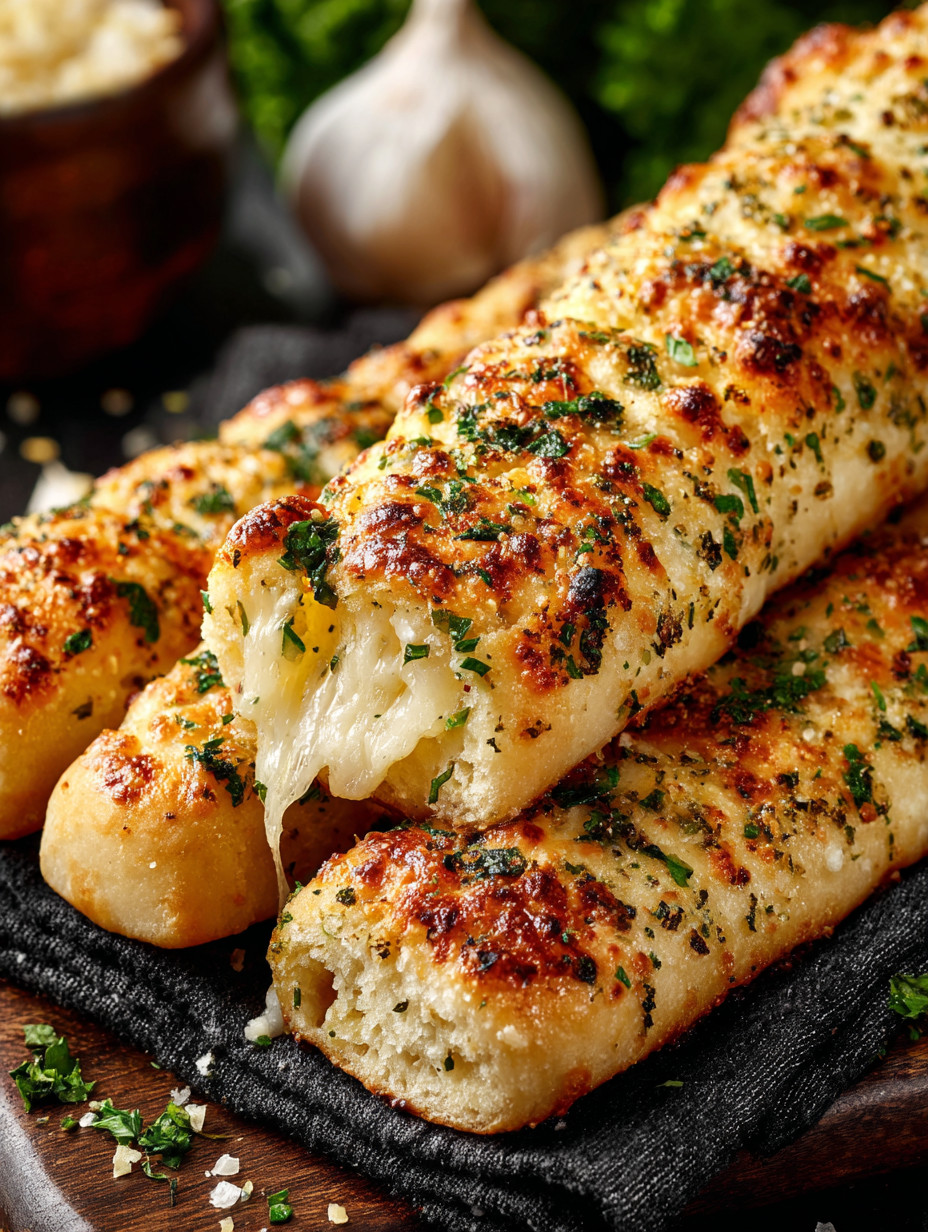
These gluten-free garlic breadsticks are soft, fluffy, and buttery with just the right amount of garlic flavor. They are perfect alongside pasta, soup, or salad and make a comforting addition to any meal. The recipe yields 12 breadsticks and comes together in about 35 minutes, making it a great option for a quick homemade treat that does not compromise on taste or texture.
I first made these breadsticks for a family dinner when one of us went gluten-free. Since then, they have become a staple for gatherings because everyone loves their rich, buttery flavor without the heaviness of traditional bread.
Ingredients
- Two cups gluten-free all-purpose flour blend with xanthan gum: this helps give the dough structure and chewiness
- Two and a quarter teaspoons instant yeast: for a reliable rise without the fuss of proofing
- One teaspoon sugar: feeds the yeast for better proofing
- Three quarters cup warm water: essential for activating yeast, should be warm to the touch not hot
- Two tablespoons olive oil: adds moisture and subtle flavor
- Half a teaspoon salt: balances the flavors and enhances the dough
- Two tablespoons butter melted: for brushing and rich flavor after baking
- Two cloves garlic minced: fresh garlic gives a bright, pungent flavor boost
- One tablespoon fresh parsley chopped: adds freshness and a pop of color
- Optional two tablespoons grated parmesan cheese: for an extra savory touch enhancing the garlic butter finish
Step-by-Step Instructions
- Saturate the Yeast Mixture:
- In a bowl, combine warm water sugar and yeast. Let sit for five minutes or until it becomes foamy. This signals the yeast is active and ready to leaven the dough.
- Combine Dry and Wet Ingredients:
- Add the gluten-free flour blend olive oil and salt to the yeast mixture. Stir until a sticky dough forms. The stickiness is key since gluten-free dough tends to be softer than traditional dough.
- Let the Dough Rise:
- Cover the bowl and place it in a warm spot for 30 to 40 minutes. The dough should rise slightly though it won’t double due to the gluten-free flour, just look for a soft puffiness.
- Shape the Breadsticks:
- Divide the dough into twelve equal portions. Shape each piece into a breadstick about six inches long and place on a baking tray lined with parchment paper. This keeps the breadsticks from sticking and promotes even browning.
- Prepare for Baking:
- Preheat your oven to 375 degrees Fahrenheit. Before baking, brush the breadsticks generously with olive oil or melted butter. This helps create a golden crust once baked.
- Bake to Perfection:
- Place the breadsticks in the oven and bake for 18 to 22 minutes. They should be golden brown on top with a soft inside texture. Keep an eye toward the end to avoid over-baking.
- Brush with Garlic Butter:
- While the breadsticks bake, melt butter in a pan over low heat and add minced garlic. Stir gently until fragrant. When breadsticks come out of the oven and are still warm, brush them with the garlic butter mixture.
- Add Final Touches:
- Sprinkle fresh parsley and grated parmesan over the breadsticks if desired. This not only looks beautiful but adds extra flavor depth. Serve the breadsticks warm while still soft and buttery.
 Pin it
I really enjoy the fresh parsley on top because it brings brightness to the rich garlic butter. A family memory I cherish is making these breadsticks together on a chilly evening with my kids. They loved shaping the dough, waiting impatiently for them to come out of the oven, and then devouring them warm.
Storage Tips
Store leftover breadsticks in an airtight container at room temperature for up to two days. To reheat, wrap them in foil and warm in a 350-degree oven for about 10 minutes to restore their softness. For longer storage, freeze the breadsticks in a sealed freezer bag for up to two months. Thaw at room temperature and reheat as described.
Ingredient Substitutions
If you need to avoid dairy, swap butter with vegan butter and omit the parmesan. For a different flavor, try fresh herbs such as basil or oregano instead of parsley. If your gluten-free flour blend does not contain xanthan gum, add about one teaspoon for better dough elasticity.
Serving Suggestions
These garlic breadsticks are brilliant alongside any Italian-inspired meal such as pasta marinara or creamy Alfredo. They also go well with hearty soups and fresh salads. For a snack, serve with a side of warm marinara sauce or a dipping oil of olive oil and balsamic vinegar.
Cultural Context
Garlic bread is a beloved part of Italian-American cuisine known for enhancing simple meals with its buttery garlic goodness. Adapting this classic to gluten-free allows those with dietary restrictions to enjoy the taste experience without compromise.
Frequently Asked Questions
- → What gluten-free flour blend works best for these breadsticks?
A blend that contains xanthan gum helps provide structure and elasticity, giving the breadsticks a soft texture.
- → How do I ensure the breadsticks are soft and fluffy?
Allow the dough to rest in a warm place until it rises slightly, and avoid overbaking to keep them tender.
- → Can I make these dairy-free?
Yes, substitute vegan butter for regular butter and omit the parmesan for a dairy-free option.
- → What is the best way to store leftover breadsticks?
Store at room temperature in an airtight container for up to two days or freeze for longer storage.
- → Can I add extra toppings to these breadsticks?
Yes, grated parmesan or fresh herbs like rosemary or oregano can add extra flavor before baking or after brushing with butter.